Wednesday, May 8, 2013

Patriotic Quilt continued....

So the excess batting is all trimmed away and the quilt is loaded.


I have a marathon quilt session in store for me this weekend.  I have the music cranked up and the wine poured.  Doesn't get much better than this....


Yes, that's a Harry Potter book on tape next to the wine.  It's the little things... : )


Thursday, April 25, 2013

Patriotic Quilt Progress

So I've been working on my friend's Patriotic Quilt and the trapunto words in the border are starting to take shape.  They were too subtle and the font was pretty thin for the quilting design I chose so I'm going to have to outline the words in some way.


I couldn't wait to see how it looked without the water soluble thread outlining it so the "O" is darker because it's wet.   Overall, I'm loving it.


Monday, April 22, 2013

Patriotic Quilt


So I completed the quilting on the patriotic quilt and outlined the trapunto words in red thread.  I'm not very happy with it though because the words are really hard to see.  Fortunately I only outlined a couple of letters in the red because I ripped it out.  I hate ripping out stitching.


I then tried a 40 weight cream colored thread for outlining the words.


Much better!  I love the quilt now. I did the binding in red fabric and reluctantly gave it back to my friend.  She cried when she saw it.  I'm so glad I went to all the trouble to do the trapunto.  It took the quilt to the next level.  She decided not to give it to her son because she loved it so much.


Patriotic Quilt

My friend approached me about a quilt top she needed quilted.  She started it when her oldest son was a baby.  This was a quilt that was taught in the one and only quilt class she has eve taken.  Her son was graduating and she wanted to finish it for him

The quilt was well done with the exception of the borders.  With the number of blocks she made it would fit a double bed.  Her son's bed is now a queen size and someone convinced her to turn the quilt sideways and add extra large borders on the long ends of the quilt in order to attempt to make it fit a queen.  It was not a pleasing look.... at all....

She gave the quilt to me and told me to do whatever I thought would look best.  She really didn't like the borders either.  In my usual style, I kept it in my studio for a time contemplating what to do.  I wanted the quilt to really reflect my friend's likes and personality.  She is a fellow Christian and very patriotic.  So I had a plan.  First, I whacked off the weird borders and made them all the same width.  Then I found a font that I liked and printed out the phrase "One Nation Under God."  I took the quilt to my place of work which has these amazing light tables.


I traced this phrase on both of the long ends of the borders.  Isn't this table amazing!!!  It really made this job easy.

I then used water soluble thread to stitch on the batting and cut away the excess batting in order to make the trapunto.  The plan is to have the words by somewhat subtle in the borders and just have them raised up as trapunto.


I'm pretty excited about it and can't wait to see how it quilts up.  I'll post more as progress is made.

Saturday, April 20, 2013

Red Snappers Purchased and Installed

I made the plunge this week and puchased some Red Snappers for my long arm.  I am so tired of pinning quilts onto the longarm.  It's time consuming and I keep pricking my fingers.  I've been contemplating a quilt loading system for about a year now and decided on the Red Snappers based on reading reviews from others.  It was also much easier to determine the size needed and I loved her videos on how to install and use the Red Snappers.

I've also been contemplating buying new leaders for my Ulimate I longarm for about a year now.  After loading a quilt I would find that one edge of the quilt would be taught while the other edge of the quilt would sag a bit.  The canvas seems to be a loose weave which allows quite bit of play.   To top it off they are not the same width.  So finding the center point is an issue.  After writing out all the issues with my leaders I don't know why I haven't changed them yet.  Anyways, I decided that I would keep them for now and see if I could square them up when I installed the Red Snappers.  You have to sew a sleeve to hold the rod and I figured I could make one end of the sleeve slightly larger on the side that sags.  In the process of doing this I found that the leader used for the quilt top was the one off of square.  Which is perfect because I'm considering taking that one off and floating my tops anyways.  As for the different width leaders, I sewed tape measures on the two leaders according to the directions on the Red Snapper web page.  I think this will really help me ensure the quilt is on the leaders and frame square.


Now it's time to get sewing and finish a quilt top so I can try out those Red Snappers!

Wednesday, October 5, 2011

#7 54 40 or Fight Quilt Block Ornament

Here is block #7 Fifty Four Forty or Fight.  This block was so easy to make.  I had it done in  about 1/2 and hour.


The name of the block is quite unusual though.  It caused me to look up 54 40 or fight on Google and I learned a little bit of history with it.  54 40 or fight was a campaign slogan for Polk in 1844 and it referred to the dispute over the Oregon Territory.  There were many claims to this land and it was at the forefront of Polk's campaign. 

I think it's interesting that a quilt block came out of it.  Imagine if today the only way we could express our opinions were to create quilt blocks.  Not that we don't but it is amazing that just a short time ago we weren't even allowed to vote.  The equality and freedoms that have come about in the last century is truly amazing.  There are so many opportunities that I take for granted that were not there even in my mother's generation.  Think about it... I'm the head of a department of about 25 people.  Many chemists both men and women and I have the opportunity to be a laboratory manager.  Not due to my gender but because of my abilities. 

It's amazing how much our culture has changed in the last 50 years.  In fact, many times as I'm watching TV I think about how if we showed some of the commercials we have today and aired them 50 or even 30 years ago there would be such an outrage.  I don't know if you've noticed but men are made out to be idiots compared to women in today's commercials and many sitcoms.  As I watch these commercials I think about what it would look like if the roles or lines were reversed.  Women would be campaigning with picket signs at the networks front steps and the products lines would probably go bankrupt.  We women didn't appreciate the way we were treated back then but I think we've swung the pendulum too far the other way.  Just for kicks you should listen to the old time radio network on satellite radio and listen to how women play the part of a ditz who can't make decisions without a man.  It's eery how much it sounds like today's sitcoms but the man is the ditz who can't make a decision without a woman.  I think women just wanted equality and respect but I think we need to remember the golden rule and treat others as we want to be treated. 

One of the best lessons I ever received was from my boss, my current lab manager.  I was meeting with him to discuss a personnel issue in my department.  I had a chemist who was really not dealing with others appropriately but it was all subtle stuff that is difficult to address and I was expressing my extreme frustration.  My boss just sat back and quietly asked me how my interactions and corrections with this chemist would change if the thought I kept in my head was that God loves this person just as much as He loves me and He died for this person just like He died for me.   Wow!  I wasn't looking at this person with love and respect.  It was just with frustration. Don't get me wrong, the behaviors this person was exhibiting were still wrong and had to be addressed.  But it had to be done with respect and love.  It revolutionized the way I managed my department. 

Wow!  Amazing the turn my thoughts take with just one quilt block.  

#6 Card Tricks Quilt Block Ornament

Here is block #6 - Card tricks.  I'm not very happy with this.  I love the pattern but I didn't do a very good job with it.  You can see that the bottom right hand side card is a little off. And of course I attached the hanger so that it's really obvious.  I believe this ornament will either live near the back of the tree or high up so you can't look too closely.  

Actually I think I'll tell people that I did that intentionally in order to make it look even more "handmade" or to follow the example set by the Amish.  I meant to put a mistake in it.  Yeah right! 

Try this one out. It's actually really fun.

Monday, October 3, 2011

#5 Virgina Reel Quilt Ornament


The Virginia Reel Ornament is another pattern much like the Log Cabin block where you can start in the center and build out.  It's an easy one that requires very little thought.  Just lots of sewing and trimming. This one took about an hour from start to binding. 


Isn't it fun looking at this one.... I find my eyes following the swirl from the center out and then getting caught swirling back in. Trippy!

Saturday, October 1, 2011

#4 Log Cabin Quilt Ornament


So for this week I wanted to work on some blocks that don't take much thought and I could just sew, cut, and watch movies.  This log cabin block was just the ticket.  All you have to do is start in the center and just start building.  What could be easier!!  The strips end up being about 1/2 inch wide so I wanted some fabrics with really small print and I'm pretty happy how this one turned out.


I have the ornaments hanging from a thread spool holder that I have hanging on my wall beside my sewing machine and they look awesome as a group.

As a side comment, it's October 1st and there are aisles of Christmas stuff already in the stores!  It's not even Halloween!  I can't do it yet.  As I think about what will be happening in my house from now until Christmas I feel like I've just started a marathon we will be running.  It's been decided that my stepson will be coming to live with us after he gets out of inpatient rehab for his brain injury.  My husband and I own a business and it allows my husband to be home most of the time.  So he will be available 24/7 to care for my stepson, Shawn.  As he heals from his injury we know that we will struggle with him thinking he can do things he really can't yet.  I can't imagine what this is like for him.  He's 20 years old and was just starting to live independently and he really needed to be living independently because he was driving us and his mom's household nuts. 

So we will all be tested over the next couple of months.  This blog will be great therapy for me. 


Thursday, September 29, 2011

#3 Churn Dash Quilt Block Christmas Ornament


Quilt block ornament #3 is finished.  45 to go. 

This was a really easy one to do and it only took about 45 minutes.  I broke this one down into 3 separate segments. and it worked out perfectly.  This is another one that I will probably make a couple different variations on.  It was again hung on the diagonal and stitched in the ditch. 


I think I'll have to figure out how to make a pattern with the stitching order written in.  Once you've done a couple of paper piecing projects it starts to make sense and it's fairly easy to tell how a project should go together. 

These ornaments are turning out to be about 3.5 - 4 inches square.  I suppose they could be made a little smaller but I kind of like this size.  I'll bet they would look awesome made with batiks!  Hmmm...

Tuesday, September 27, 2011

Christmas Ornament Project Goal

As I've been looking over my blogs since I began this site it's apparent that I haven't been making anything that resembles a regular post.  I think it's partly because I haven't viewed this blog as a project or that it's really about anything.  Since I've been making the quilt block Christmas ornaments this has changed.  That's a project I can get excited about.  I've been finding myself preparing for a weeks worth of blogs on the weekends. 

The other thing that is apparent to me is that this blog is giving me some much needed therapy.  On August 26th my stepson was in a long boarding accident (long skateboard) and sustained a traumatic brain injury to the frontal lobe.  He was in the ICU for a week and has since been in an inpatient rehab clinic.  The doctors have told us that they expect him to have a full recovery but it's just going to take a long time.  This experience has been a real eyeopener for me.  I didn't realize how prevalent this trauma is and how long it takes for people to recover from these traumas.  Writing and preparing this blog has provided another world for me in which I'm in control.

So I'm going to set a goal for the blog.  I want a total of 48 Christmas ornaments.  That will make a total of 12 ornaments for each of my kids: 2 daughters and 2 stepsons.  I'll keep posting the ornaments and the progress of the project. 

May the therapy continue!

Friday, September 23, 2011

#2 Dutchman's Puzzle Christmas Ornament

The next block I wanted to try is the Dutchman's Puzzle.  I love all the little triangles and how they can make several different pinwheel patterns.  I put some Christmas green into this one and I think I'll make a couple different variations.  Here is the first one. 


This was a little easier to do than the Ohio Star.  The block was separated into basically 4 units of flying geese and then put back together.  It just had a bunch of really little pieces so it took about an hour to do but it made for some good  movie time.

I attached the hanger so that it will hang on the diagonal and I think for this one it works.  I don't know why I attached the strings to the front of the quilt.  I won't do that again.

This is a really fun project and I'm enjoying it immensely.  It's very gratifying to have a completed little quilt in about an hour. 

2 down 22 left to go. 


Wednesday, September 21, 2011

#1 Ohio Star Christmas Ornament

So the first ornament I'm going to work on is Ohio Star.


I know that there are a lot of pieces to it but I figure I might as well jump on in.


Fortunately I had a bunch of Christmas fabric scraps left over from the Christmas Quilt I had finished. I have no idea why I saved them. The majority of the pieces were too small to do much with. But it turns out they are the perfect size for miniature quilt blocks. Another trip to the store was saved by my obsession with saving fabric!


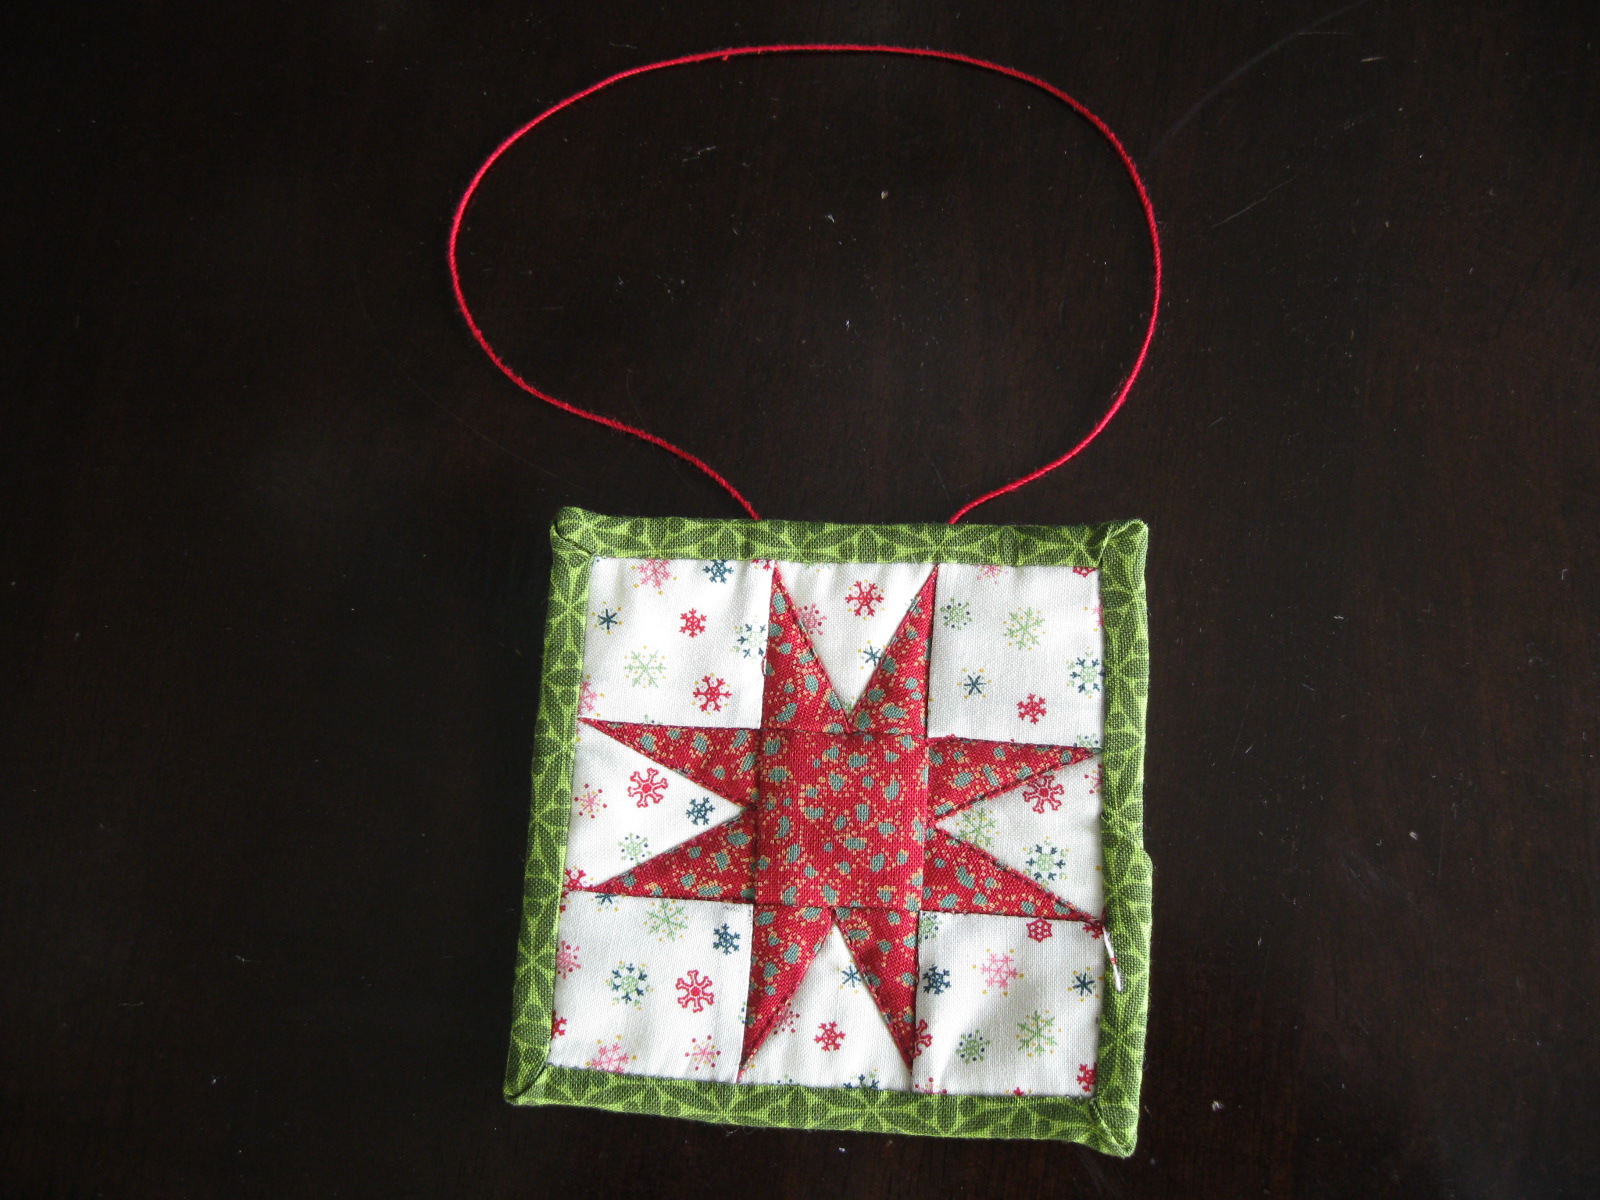
Instead of a 1/4 inch seam allowance I'm using 1/8 inch seam allowance. I figure that the little quilt won't get a lot of hard use and 1/8 inch should be adequate. I am keeping the outside seam allowance of the block at 1/4 inch so that I can use a traditional 1/4 inch binding. I have some red crochet thread that I used for hanging the block.


I attached it the thread under the binding in the back,  I quilted it by stitching in the ditch. This was done with the feed dogs engaged so that the lines were nice and straight and even stitches.


It took me about 1 hour to complete the Ohio Star. This includes looking through the book, the aha moment, copying the pages, building the block, quilting it, and making and adding the binding.


I want to make about 24 ornaments so now that I know what to look for I did a quick google for images of traditional quilt blocks and printed out a bunch of them. I can't wait to have more machine time.

Tuesday, September 20, 2011

Quilt Block Christmas Ornaments

Last Christmas I had decided to make Christmas ornaments and have a handmade Christmas tree for this year.  I've been diligently working on crocheting snowflakes and have made about 20.  So it's time to start working on the quilt blocks. 

I've been really struggling to find traditional quilt block patterns small enough to be ornaments.  There are quite a few ornament patterns but I haven't found any for traditional quilt blocks.   I also don't want these to look cheesy.  It's amazing the amount of time you can spend on the Internet looking for these things.  And if you're like me, I'll start out googling "quilt block ornaments" and end up looking at kayaks.... It's almost like a Googling evolution.  I'm sure there will be a government study on it....

Anyways.  I'm bombing with finding patterns for quilt block ornaments.  So I pulled a book off my shelf which has some traditional blocks in it to see if there was a way that I could develop my own patterns.  I'm not a traditional quilter so I think I own only one book with traditional patterns. I thought that I could maybe I could cut down the size by doing some math.  I'm staring at some of these pictures and it hits me that the picture of the block is close to the size that I want the ornament to be... And I could easily copy the page and use it as a paper pieced pattern.  Woo Hoo!!  Fortunately we have a copier at home (you can find them really cheap at used office supply companies or EBay) and I played with enlarging some of the pictures until I had just the size I wanted. 

I really love that moment when something perceived as a problem is suddenly solved and an easy solution is found. 

The first pattern I'll try is Ohio Star.  Wish me luck!

Monday, January 10, 2011

Snow Flake Quilt

It seems that I'm on a snowflake theme this year.  I started a quilt that I've been dreaming about making for the last couple of years.  I finally summoned the courage to make it.  It's a feathered star pattern and very intimidating.  The majority of my quilts have been art quilts for walls.  Most of these have been given away to various people.  This one will be for me and my bed.  I know... how weird... a quilt for a bed. 


The reason this pattern is intimidating is because of all the little half square triangles, biased edges and inset seams.  Several years ago I made a practice block and I did such a terrible job I knew that my skills needed some serious improvement before I attempted it.  Over Thanksgiving weekend I decided it was time.  I had recently discovered a secret weapon for accurate piecing and cutting.  Spray Starch.  Yep, that's all it is.  Starch the heck out of the fabric while cutting and piecing.  It did wonders.  The other thing that made these blocks successful is increased patience and discipline.  I didn't rush the piecing and if a seam wasn't perfect, I ripped it out and did it again.  It's amazing how many seams had to be redone.  Each time there was a seam that wasn't perfect I asked myself if I could live with looking at it on my bed.  That usually did it. 


I think I'm going to set the blocks so that I have a lot of white space for quilting.  This is where the blocks are so far.  It's just needing all the white fabric in between all the blocks and a decision on what designs to quilt in the white spaces.  I'm also not sure if there needs to be some additional design elements added.  Maybe some appliqued designs on the corners and center to enhance the quilting design and trapunto?  Not sure.  The quilt hasn't finished speaking to me yet. 

Saturday, January 8, 2011

Homemade Christmas Ornaments - Crocheted Snowflakes

I had a really difficult time getting into the Christmas spirit this year.  This is the first year that both of my daughters weren't going to be home for Christmas.  My oldest daughter, Melissa, is married to a Marine (Brantly) and they are stationed in San Diego.  Brantly is being deployed in January so they decided to spend Christmas with his family before he ships out.  So that meant no daughter, son-in-law, or granddaughter for Christmas.  My youngest daughter is in Misawa Japan and this is the first year she has not been home for Christmas.  So the Christmas spirit wasn't overflowing my heart this year.

My sweet husband bore the brunt of it.  It's usually the girls that decorate the tree and since they weren't here it was left to me.  Jeff and I went out and bought a Charlie Brown tree and had it up in the living room for about a week before we got around to decorating it.  I spent that week trying to figure out how I'm going to cope with an empty nest around Christmas in the future.  I obviously wasn't into decorating.  When we did finally decorate the tree I was grumbling the whole time about what a stupid tradition it is to cut down a perfectly good tree and haul it into our house and put a bunch of expensive crap on it.  I mean really.... have you ever thought how silly that is?!?!?!  I decided that next year we're doing something different.  I suggested to Jeff that we just have a really big poinsettia.  I don't think he was too thrilled about that one.  So that's when I decided that next years' tree will have home crafted ornaments. 

So the search began.  I want to have little quilt block ornaments, yo-yo garland, and crocheted snowflakes.  I started with the snowflakes.  I found the best site for crocheted snowflakes and started right away.  You can find these patterns at snowcatcher. 


These are all designed by a very talented lady who has the ability to look at a snowflake picture and turn it into a pattern. 

I have 13 snowflakes blocked, starched, and glittered.  They are so fun to make that now I'm hooked.  She posts a new pattern every Monday.  For the last two weeks I eagerly check her blog on Monday to see what new masterpiece she has come up with.  These beauties look wonderful with batik fabric behind them.  I'm not sure if I want them to hang free on the tree or attach them to fabric first.  I'll have to play with it. and see.

I'm already looking forward to next Christmas.  If you know of some great ornament patterns please share.  I'll continue to post any that I find and make.

Hope you had a wonderful Christmas!

Thursday, January 6, 2011

Finished Christmas Quilt

The Christmas Quilt finished beautifully!  I'm very pleased with how it turned out and I hung it up as soon as I reasonably could for Christmas.  This quilt is for my daughter, Courtney, who is currently stationed in Misawa Japan.  It was fun to show her the quilt on Skype.  She will get it permanently once she settles down a little and isn't moving around so much. 


The pattern suggested using seed beads for the ornaments on the trees with stars.  I used iron-on swarovski crystals instead.  They come in several different sizes which made it that much easier for the different size trees. 


You can see the crystals on the trees around Santa's house.


Wednesday, August 4, 2010

Christmas Quilt


I put the Christmas quilt on the frame yesterday and I'm almost done! Starting to feel really good about the progress I'm making on getting all the UFO's done. I've been working on this one for 1 1/2 years now. I know.... that's a long time but there's a story with it.

I started it Christmas of 2008 when my daughter Courtney was home from the Air Force on leave. I had been really missing her. She had been gone to boot camp and tech school since July of 2008. I was trying to drink in every minute of her visit. Courtney and I are really close. She's quite artistic and was wonderful about drawing my visions for various quilts. During her visit we went to my favorite quilt shop and she picked out this pattern and kit. I had been wanting to do some red work for quite a while. So even before she left to go back to the Air Force I started working on it to help me work through missing her. It worked. Everytime I stitched on it I thought of her and all the travels we'd been on. There are literally tears, sweat, and blood on this one. I pricked my finger and bled a couple of times. The tears came right after she left at the end of her break. I'll be thrilled to hang it on my wall this year for Christmas. It'll be my reminder of her as I doubt she will get to come home this year. She is currently stationed in Misawa Japan. I plan to give it to her. I'm just not sure when yet.

That's one of the things I love about quilts, it's not just a bunch of fabric and thread holding it together. There's a story behind each one that makes them special.

The quilt will be done soon and I'll post the finished picture.
Posted by Picasa

Sunday, August 1, 2010

4th of July Fireworks Angel


Every year we have a big 4th of July party. I just had to share this photo I captured. I always knew we had angels watching out for us... Here's the proof!
Posted by Picasa

Sunday, May 30, 2010

I've been bad... I know...

It's been a long time since I've posted anything.  But that's because it's been a long time since I've done any quilting.  I haven't been feeling inspired or creative for months now and it's time to break the cycle.  And I know why I feel this way.  The truck quilt is scaring the crap out of me.  This is the first time I've tried something like this and I'm afraid that it won't live up to the picture in my head.  So I guess if I don't work on it I won't fail, right......? 

So what I'm doing to get myself motivated is finish up some of my other projects to boost my confidence. 

My Oriental quilt is almost finished.  I want to show this quilt in some local shows, so I'm going to try blocking a quilt for the first time.  If you're not familiar with blocking, it's taking a wet or damp quilt and stretching and pinning it to the desired dimensions on a flat surface.  This enables the quilt to be square and hang flat.  I wasn't familiar with blocking so I watched a DVD of Karen McTavish blocking a quilt.  I tried it with the help of my husband and it was a dismal failure!  The quilt ended up not being square on the first try.  Then we tried blocking it using my husbands suggestions on how to keep the quilt square.  This caused the quilt to be stretched out larger than it's original dimensions.  This caused the appliqued tree trunk to pull away from the quilt.  I was devastated.  We pulled the pins out and I put the quilt away for a the rest of the night and drank a glass of wine.  The next day I tried again.  This time, I measured out the final dimensions and marked those dimensions on the foam boards I was using.  I started with the corners and pinned those, then the pinned the centers.  From there, I pinned each opposite side.  It worked perfectly!


It's amazing how much easier it was to trim the quilt after blocking the quilt.  It ended up sqaure and flat.  Next comes the binding.....